ComfyUI
Prepare ComfyUI
This document assumes you have installed ComfyUI (either the portable or the desktop version).
Copy the .bat file you use to start ComfyUI and add the --port parameter.
--port 8188
You can put any port you want, but this example will use 8188.
If you are using a remote ComfyUI instance
If you are using a remote ComfyUI instance, you may want to add the --listen parameter as well.
--listen 0.0.0.0
You will then also need to obtain the IP address of the computer running ComfyUI and use it in the Talemate configuration. (instead of localhost)
Confirm ComfyUI is running in your browser by visiting http://localhost:8188 or http://<ip-address>:8188 before proceeding to talemate.
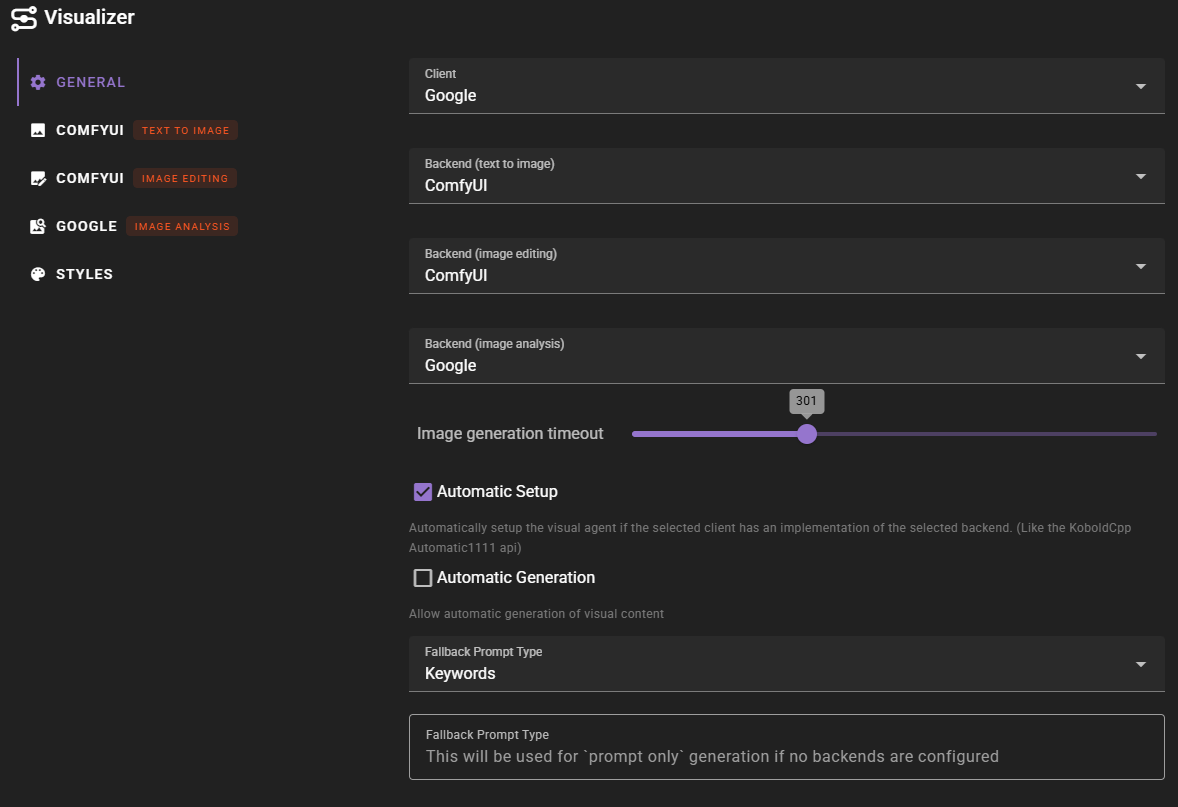
Talemate configuration
In the Visualizer agent settings, select ComfyUI as your backend for text-to-image generation, image editing, or both. You'll need to configure each backend separately if you want to use ComfyUI for different operations.
Text-to-Image Configuration
For text-to-image generation, configure the following settings:
- API URL: The URL where your ComfyUI instance is running (e.g.,
http://localhost:8188) - Workflow: Select the workflow file to use for generation. Talemate includes several pre-configured workflows including
qwen_image.jsonandz_image_turbo.json - Model: Select the model to use from your ComfyUI models directory. If your workflow doesn't include a "Talemate Load Model" or "Talemate Load Checkpoint" node, this will be set to "- Workflow default -" and the model specified in the workflow file will be used.
-
Prompt Type: Choose between "Keywords" or "Descriptive" prompt formatting
Choosing Prompt Type
As a general rule: SDXL models typically work best with Keywords formatting, while most other models (including Qwen Image, Flux, etc.) work better with Descriptive formatting. If you're unsure, start with Descriptive and switch to Keywords if you're using an SDXL-based workflow.
-
Resolutions: Configure the pixel dimensions for Square, Portrait, and Landscape formats
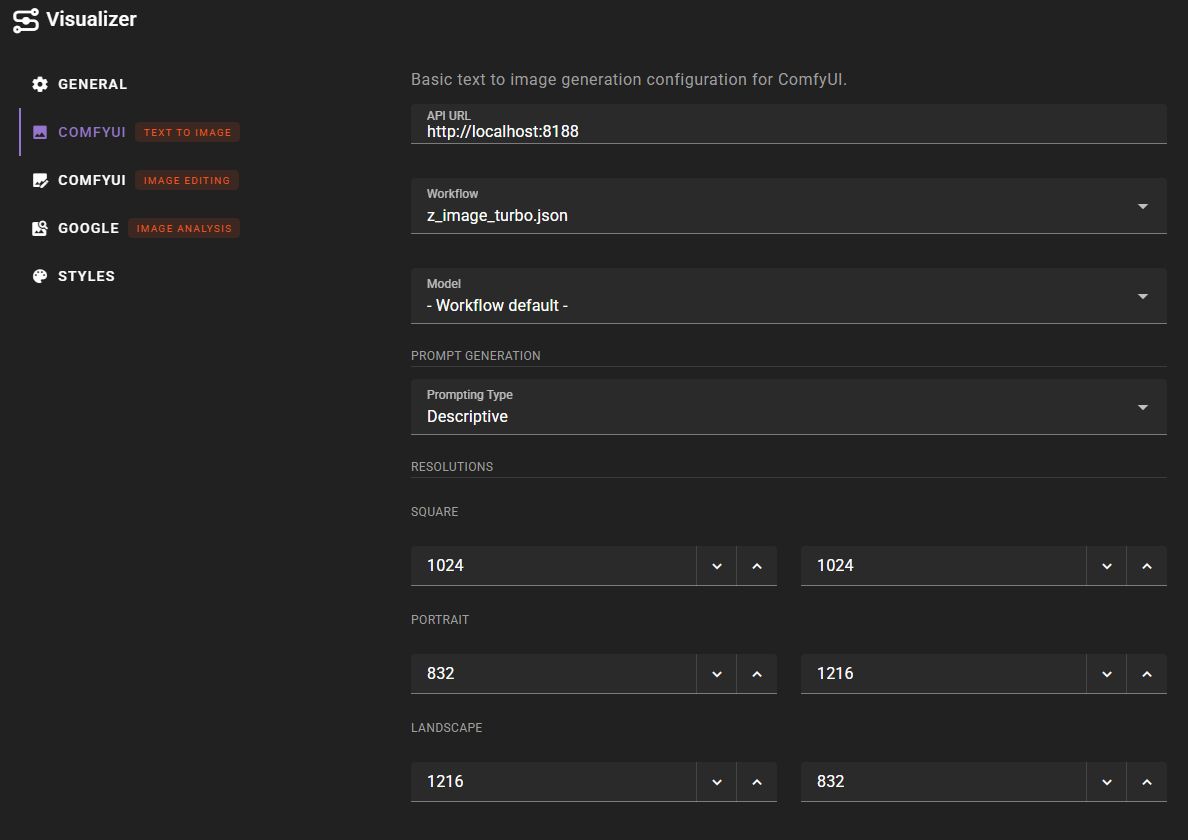
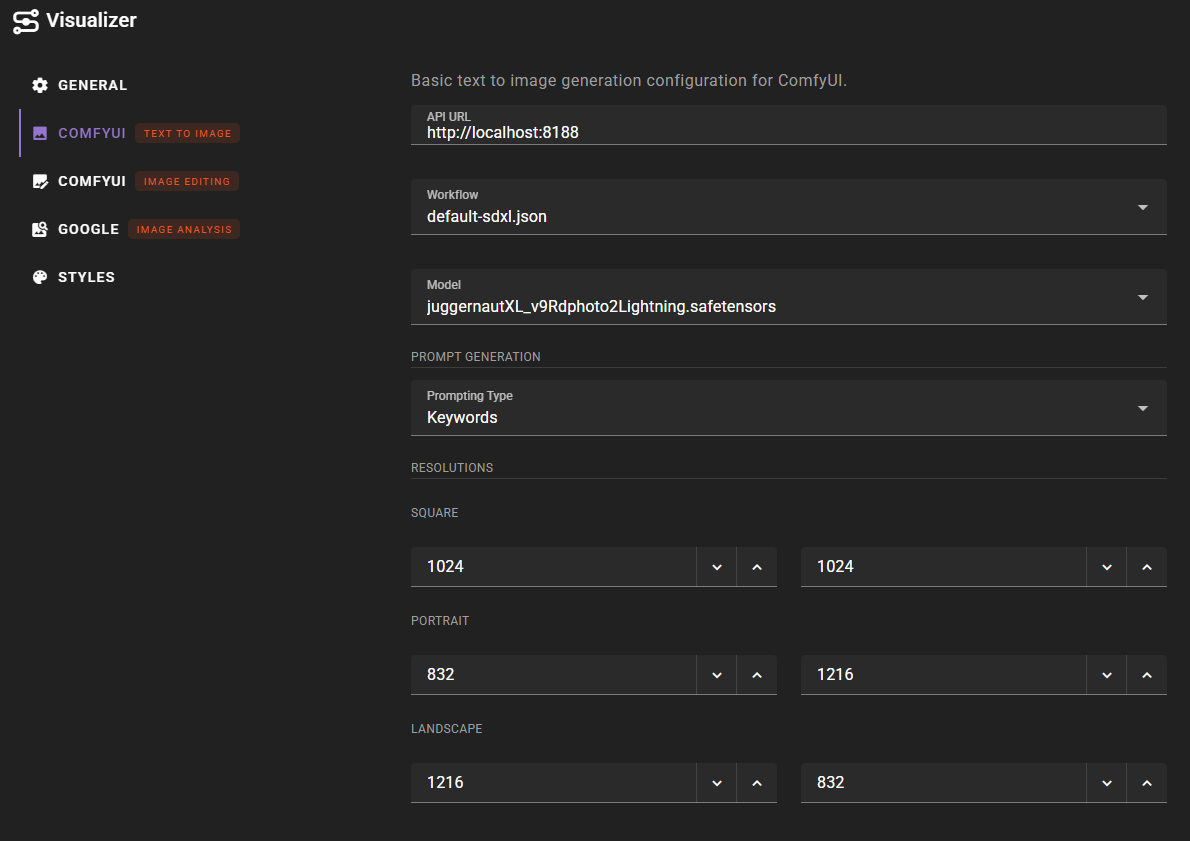
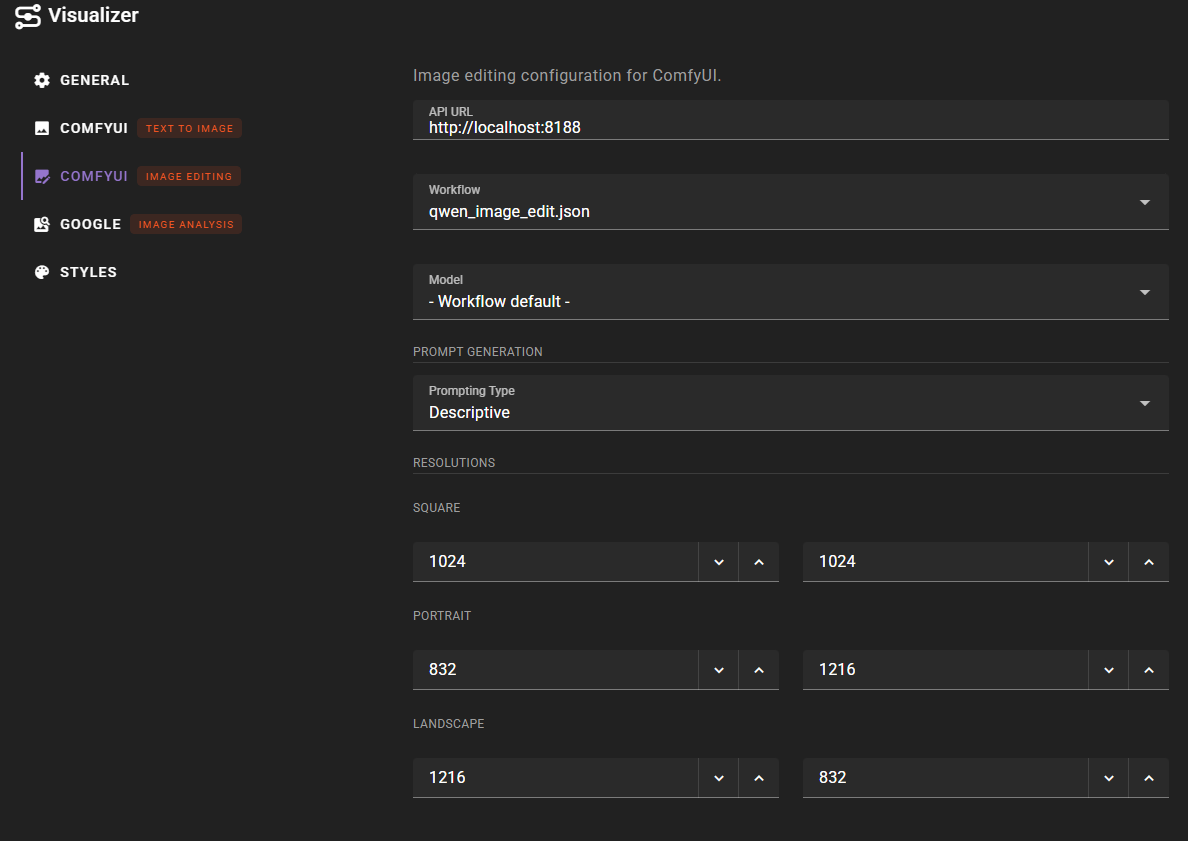
Image Editing Configuration
For image editing, configure similar settings but select an image editing workflow such as qwen_image_edit.json. The number of reference images supported depends on your model - for example, Qwen Image Edit can handle up to 3 reference images that can be used to guide the editing process.
Prompt Type for Image Editing
Image editing workflows typically use Descriptive prompt formatting by default, as most image editing models (like Qwen Image Edit) work better with descriptive instructions rather than keyword-based prompts.

Custom workflow creation
Talemate comes with pre-configured workflows for Qwen Image models (qwen_image.json for text-to-image and qwen_image_edit.json for image editing). However, since there are many variables in ComfyUI setups (different model formats like GGUF vs safetensors, custom LoRAs, different hardware configurations, etc.), you may want to customize these workflows to match your specific setup.
Starting from a Template
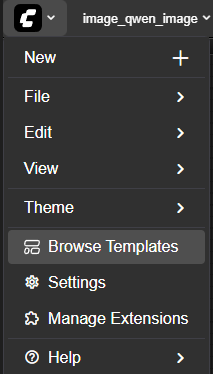
Open ComfyUI in your browser and navigate to the templates menu. ComfyUI includes workflow templates that you can use as a starting point:
- Qwen Image: For text-to-image generation
- Qwen Image Edit: For image editing workflows
These templates provide a good foundation for creating custom workflows.
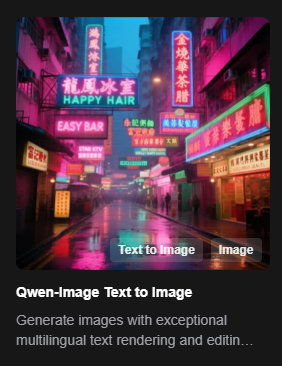
Load the Qwen Image template to see the base workflow structure.
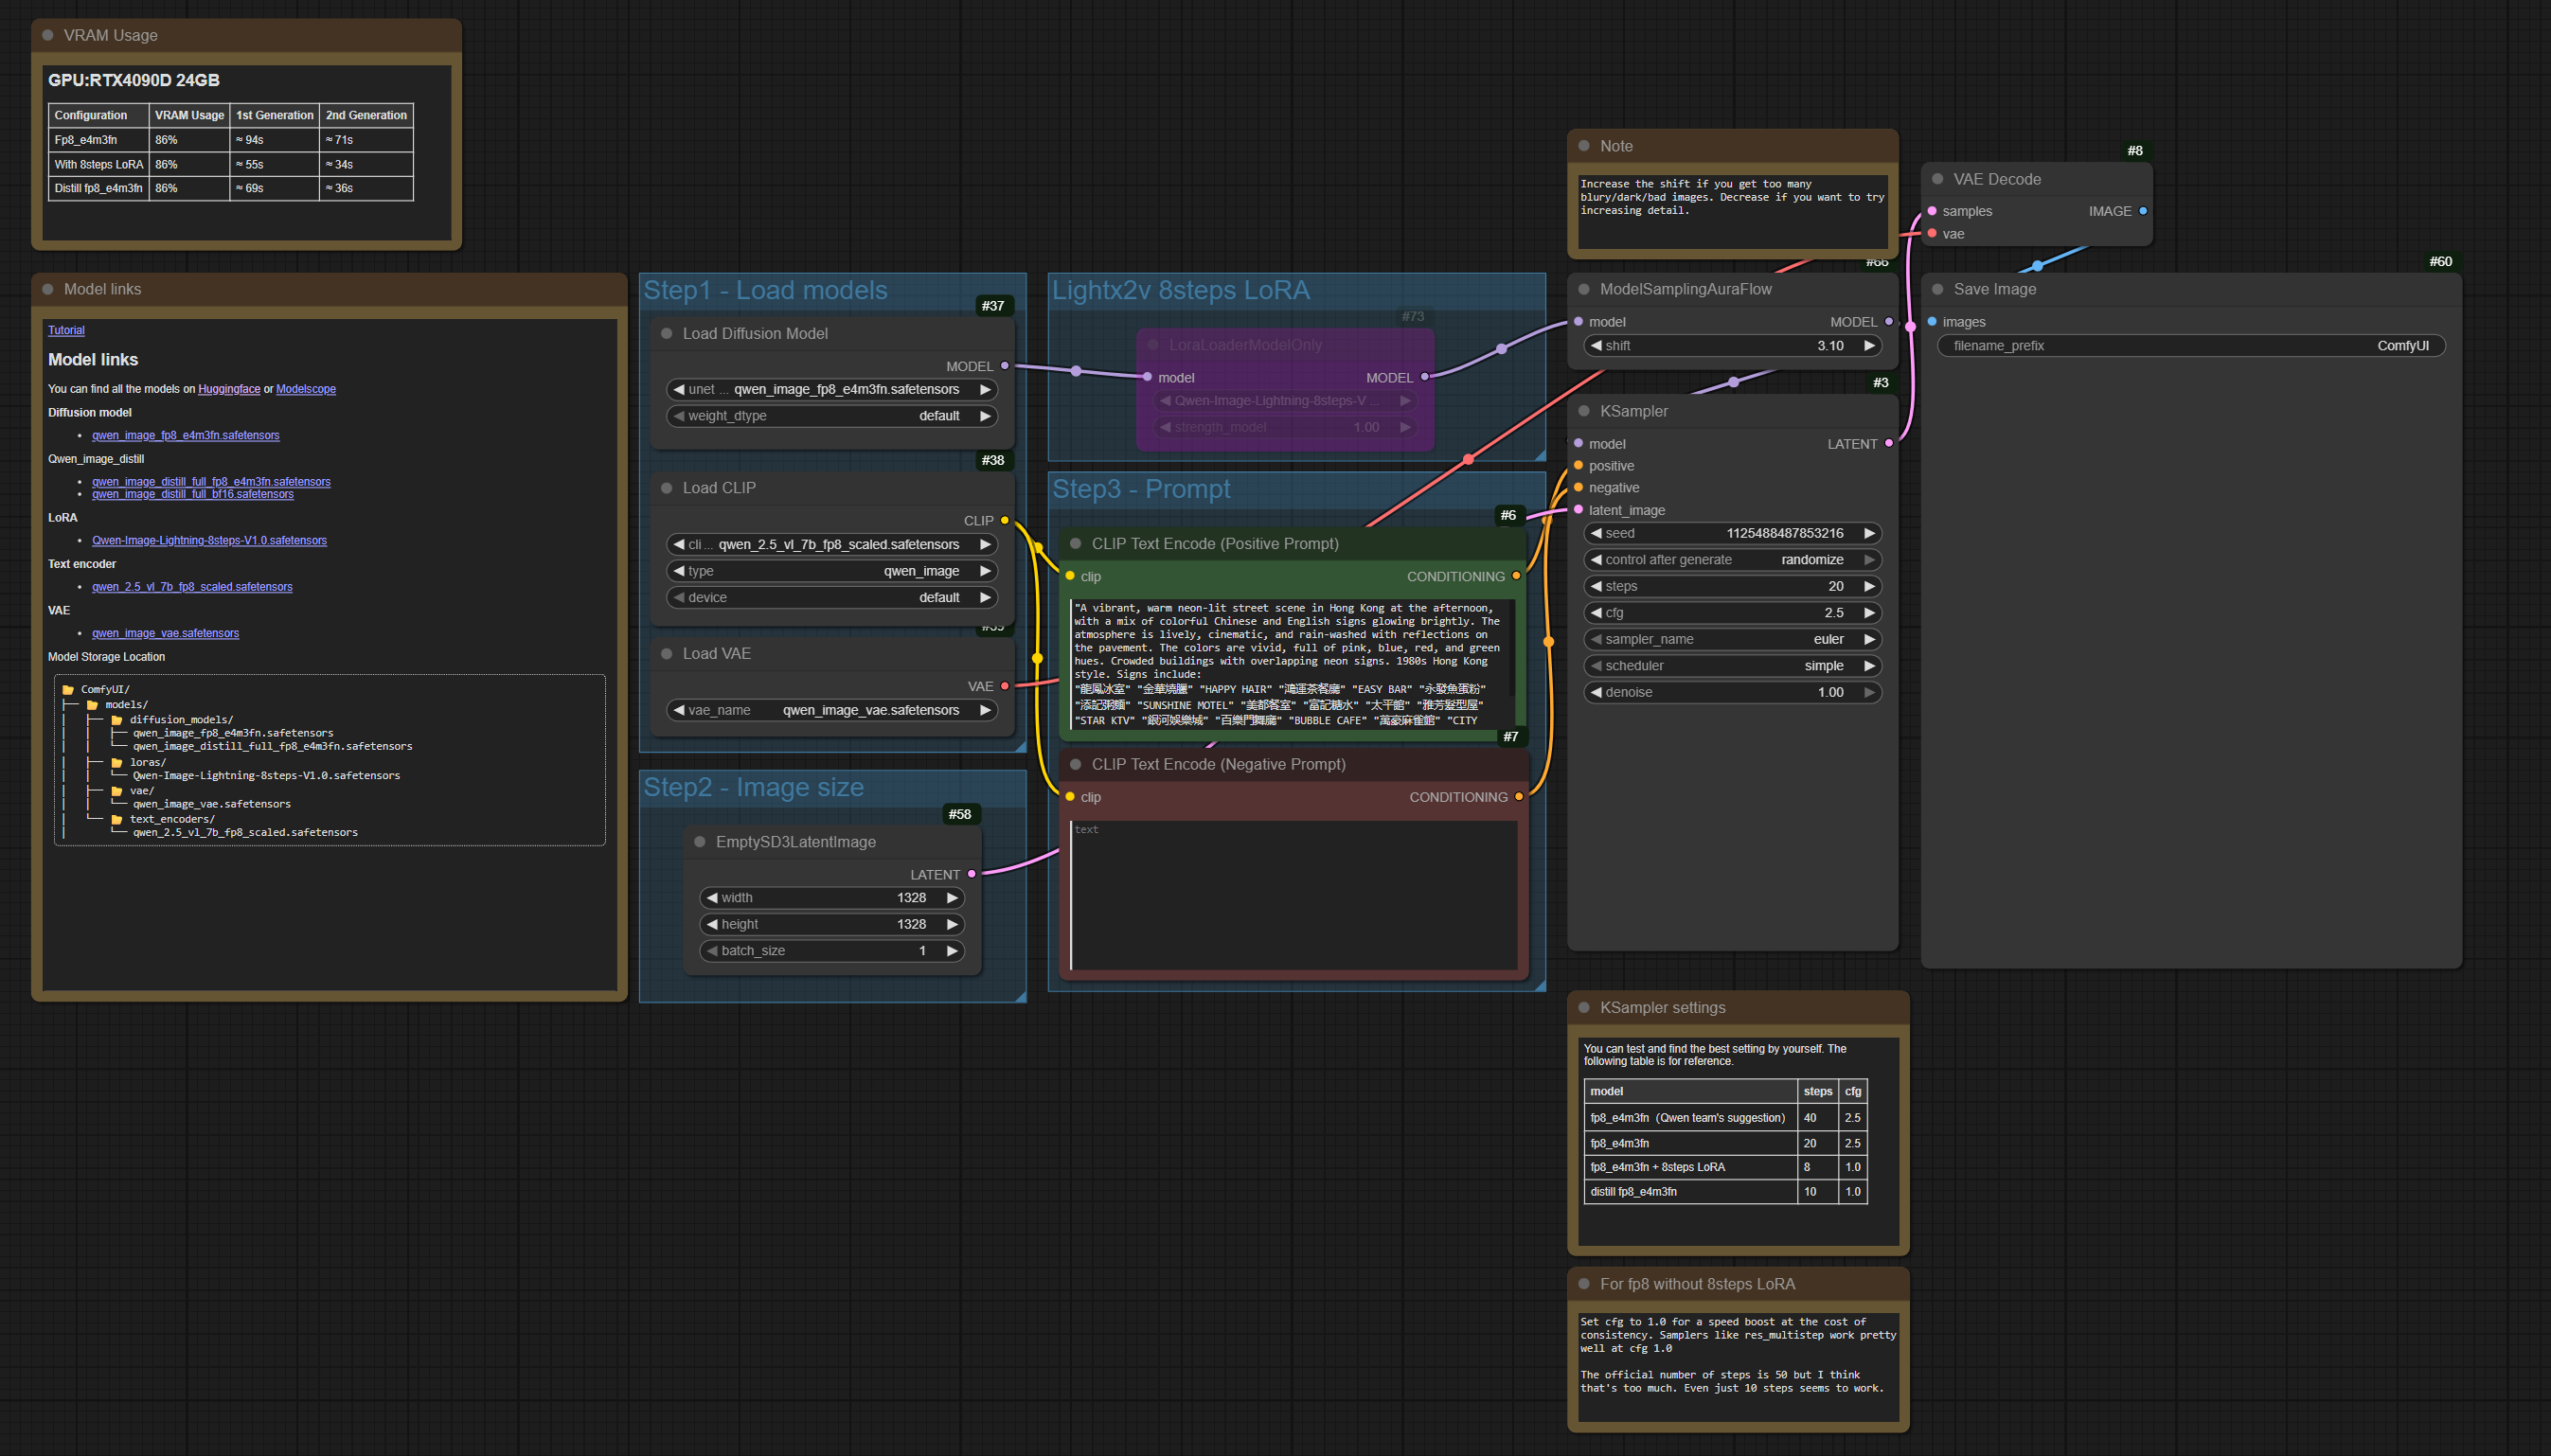
Naming Nodes for Talemate
For Talemate to properly interact with your workflow, you need to rename specific nodes with exact titles. These titles allow Talemate to inject prompts, set resolutions, and handle reference images automatically.
Required Node Titles:
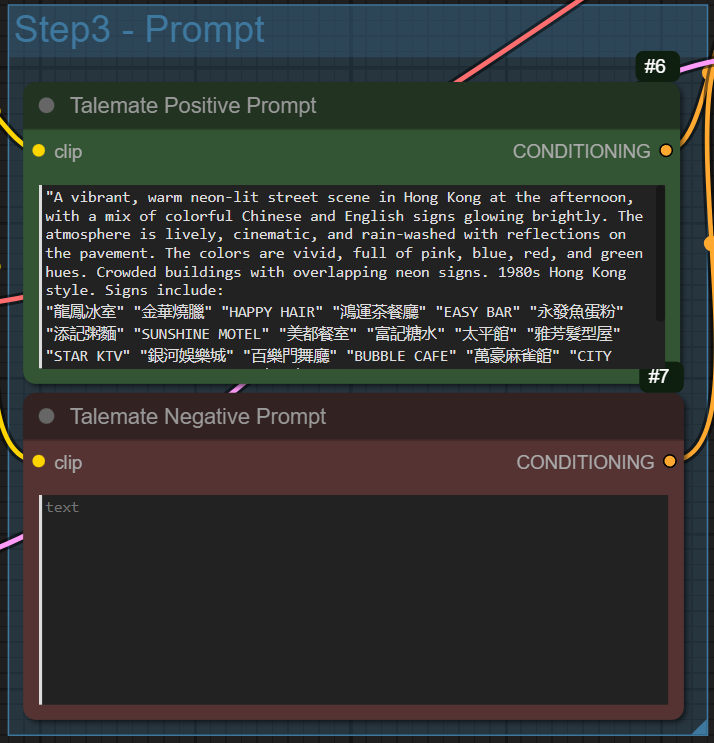
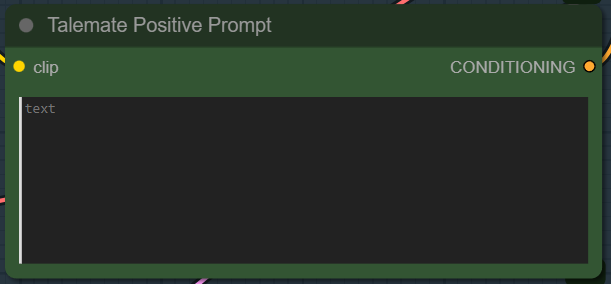
- Talemate Positive Prompt: The node that encodes the positive prompt (typically a
CLIPTextEncodeorTextEncodeQwenImageEditPlusnode). This is required - workflows without this node will fail validation. - Talemate Negative Prompt: The node that encodes the negative prompt (same node types as above)
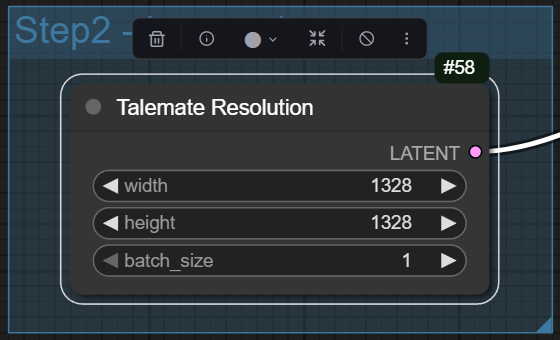
- Talemate Resolution: The node that sets the image dimensions (typically an
EmptySD3LatentImageor similar latent image node)
Optional Node Titles:
- Talemate Load Model or Talemate Load Checkpoint: If you want to allow model selection from Talemate's settings, rename your model loader node (typically
CheckpointLoaderSimple,UNETLoader, orUnetLoaderGGUF) to one of these titles. If this node is not present, Talemate will use the model specified in the workflow file itself, and the model dropdown will show "- Workflow default -" as the only option.
To rename a node, right-click on it and select "Rename" or double-click the node title, then enter the exact title name.
Activating the Lightning LoRA (Optional)
The Qwen Image template includes a Lightning LoRA node that is deactivated by default. You can optionally activate it to speed up generation with fewer steps. Note that this is a trade-off: the Lightning LoRA reduces generation time but may degrade image quality compared to using more steps without the LoRA.
To activate the Lightning LoRA:
- Find the
LoraLoaderModelOnlynode in your workflow (it should already be present in the Qwen template) - Connect it between your model loader and sampler if it's not already connected
- Load the appropriate Lightning LoRA file (e.g.,
Qwen-Image-Lightning-8steps-V1.0.safetensorsfor 8-step generation) -
Adjust your sampler settings:
- Steps: Reduce to 8 steps (or 4 steps for the 4-step variant)
- CFG Scale: Set to 1.0 (lower than typical values)
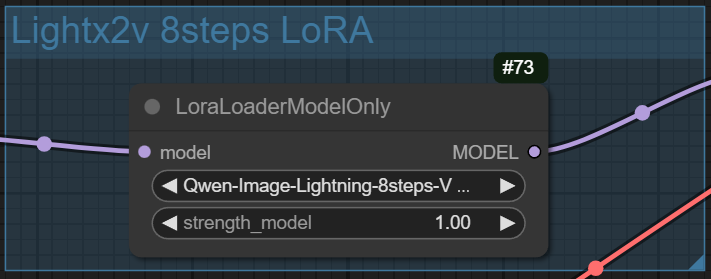

Image Editing Workflows: Reference Nodes
For image editing workflows (like qwen_image_edit.json), you need to add reference image nodes. Note that ComfyUI includes a Qwen Image Edit template similar to the Qwen Image template, which you can use as a starting point.
Reference Nodes Required
Image editing workflows must define at least one reference node. If your workflow doesn't include any nodes titled "Talemate Reference 1" (or higher), the backend status will show an error and image editing will not work.
These are LoadImage nodes that Talemate will use to inject reference images for editing.
The number of reference nodes you can add depends on your model's capabilities. For example, Qwen Image Edit supports up to 3 reference images. Add LoadImage nodes and rename them with these exact titles:
- Talemate Reference 1
- Talemate Reference 2
- Talemate Reference 3 (if your model supports it)
These nodes should be connected to your prompt encoding nodes (for Qwen Image Edit, use TextEncodeQwenImageEditPlus nodes that accept image inputs).

Automatic Deactivation of Unused Reference Nodes
Talemate automatically handles situations where your workflow contains more reference nodes than you provide images for. When you run a generation:
- If you provide fewer reference images than the workflow supports, the unused reference nodes are automatically disconnected from the workflow graph
- If you provide no reference images at all, all reference nodes are disconnected
This means you can use a single image editing workflow for both text-to-image generation and image editing operations. For example, if you configure qwen_image_edit.json as your image editing backend:
- When you generate with reference images, those images are uploaded and connected to the appropriate reference nodes
- When you generate without reference images (pure text-to-image), all reference nodes are disconnected automatically, allowing the workflow to run as a standard text-to-image workflow
This behavior prevents errors that would otherwise occur if ComfyUI tried to process reference nodes without actual images loaded into them. You do not need to create separate workflows for text-to-image and image editing - a single workflow with reference nodes can serve both purposes, assuming the model supports it (qwen-image-edit 2511 seems to.)
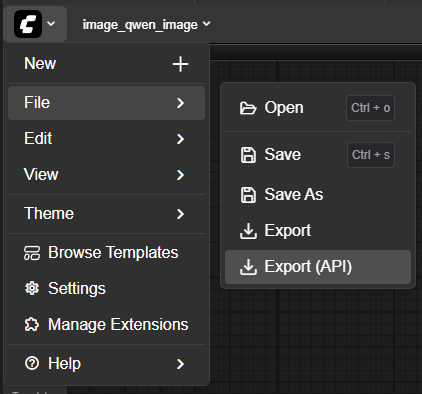
Saving and Exporting the Workflow
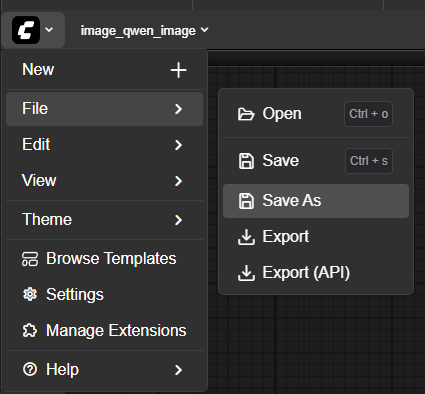
Once your workflow is configured, you need to save it and export it in the API format for Talemate to use it.
- Save the workflow: Use File → Save As to save your workflow as a
.jsonfile in your ComfyUI workflows directory - Export for API: Use File → Export (API) to create the API-compatible version
Export vs Export (API)
It's critical to use "Export (API)" and not just "Export". The regular export format is not compatible with Talemate's API integration. The API export format includes the necessary metadata and structure that Talemate expects.
After exporting, place the workflow JSON file in Talemate's templates/comfyui-workflows directory. Once placed there, it will automatically appear in the workflow dropdown in Talemate's ComfyUI settings.
Workflow File Location
Workflow files must be placed in Talemate's templates/comfyui-workflows directory, not ComfyUI's workflows directory. Talemate loads workflows from its own templates directory to ensure compatibility and proper integration.
Workflow Not Appearing?
If your workflow file doesn't appear in the agent's settings dropdown after placing it in the correct directory, try reloading the Talemate browser window. The workflow list is refreshed when the page loads.
Hot-Reloading Workflows
Changes to workflow files are automatically detected and reloaded by the agent. After modifying a workflow file, your changes will be applied to the next image generation without needing to restart Talemate or reload the browser window.