Settings
The Visualizer agent settings are organized into three main sections: General, Prompt Generation, and Styles. Additionally, each backend may have its own configuration options, including resolution presets for local image generation backends.
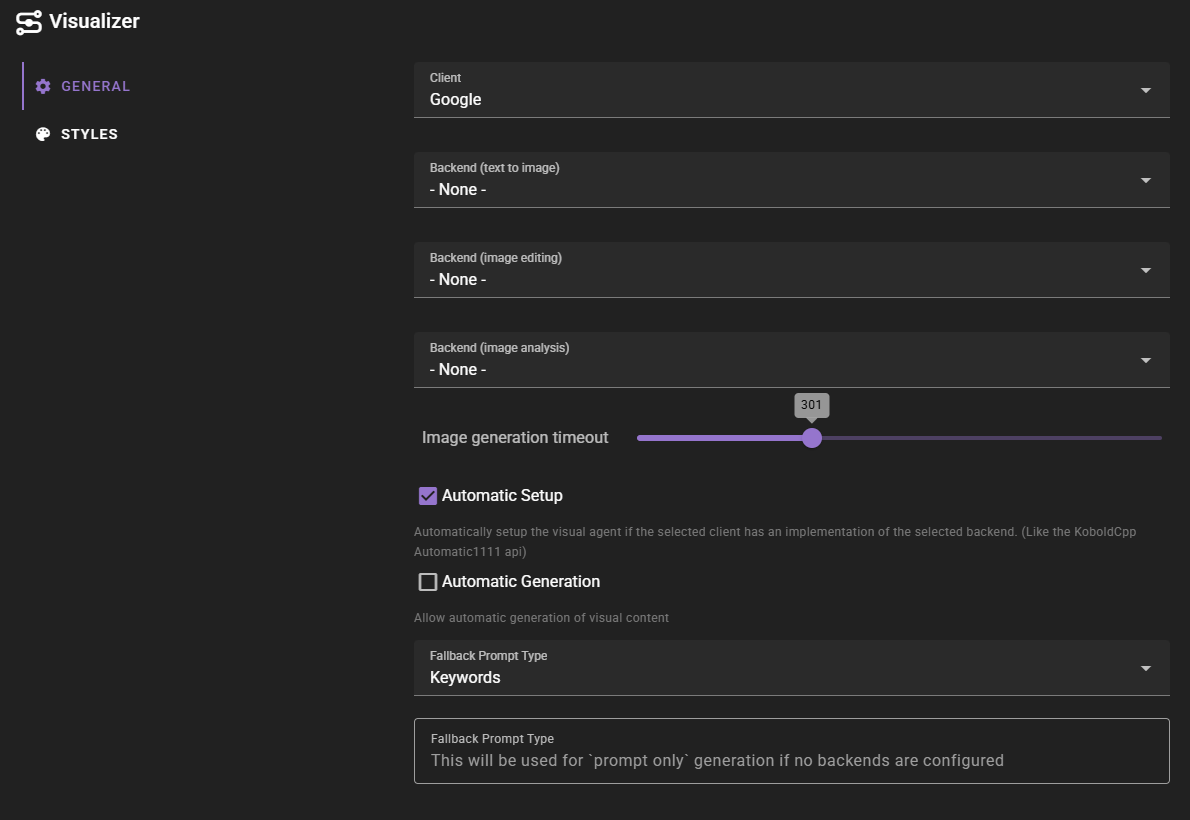
General Settings
Backend Configuration
The Visualizer agent supports separate backends for different types of operations. You can configure each independently:
- Backend (text to image): The backend to use for basic text-to-image generation. This is the primary backend used when generating new images from prompts.
- Backend (image editing): The backend to use for contextual image editing. This allows you to modify existing images using reference images.
- Backend (image analysis): The backend to use for image analysis. This enables AI-powered analysis of images to extract information.
Backend Selection
Not all backends support all three operations. The dropdown menus will only show backends that support the specific operation. You can use different backends for different operations if needed.
Image Generation Timeout
Controls how long the agent will wait for an image generation request to complete before considering it failed. The default is 300 seconds (5 minutes), and can be adjusted from 1 to 900 seconds (15 minutes).
If a backend doesn't generate an image within this time limit, the generation will be marked as failed and you'll be notified.
Automatic Setup
When enabled, the Visualizer agent will automatically configure backends if your selected client has built-in support for them. For example, some clients like KoboldCpp provide an Automatic1111 API that can be automatically detected and configured.
This setting is enabled by default and helps streamline the setup process when using compatible clients.
Automatic Generation
When enabled, allows the Visualizer agent to automatically generate visual content based on scene context. This can be useful for automatically creating character portraits or scene illustrations as your story progresses.
This setting is disabled by default, giving you full control over when images are generated.
Prompt Generation
The Prompt Generation section contains settings that control how image prompts are created and refined before being sent to the image generation backend.
Fallback Prompt Type
Determines the format used for prompt-only generation when no backends are configured. This setting only affects the output format when generating prompts without actually creating images.
Available options:
- Keywords: Generates prompts using keyword-based formatting
- Descriptive: Generates prompts using descriptive text formatting
Max. Prompt Generation Length
Controls the maximum token length for AI-generated image prompts. When you use Instruct mode or any feature that asks the AI to create a prompt for your image, this setting limits how long that generated prompt can be.
The default is 1024 tokens, and can be adjusted from 512 to 4096 tokens.
Both keyword-style and descriptive prompts are always generated together, so this limit must accommodate both formats.
Automatic Analysis of References
When enabled, reference images that lack analysis data will be automatically analyzed before being used in prompt generation. This ensures that the AI has detailed information about your reference images when creating prompts, which can lead to better results when generating variations or editing images.
How It Works
Normally, you analyze images manually using the Analyze button in the Visual Library. The analysis text captures details about the image content, which can then be used during prompt generation to help the AI understand what your reference images contain.
With Automatic Analysis of References enabled, any reference images that don't already have analysis data will be analyzed on-the-fly when you start a generation. This is particularly useful when:
- You have uploaded images that haven't been analyzed yet
- You're using newly saved images as references before analyzing them
- You want to ensure all references have analysis data without manually analyzing each one
The analysis results are saved to the asset metadata, so each image only needs to be analyzed once. Future generations using the same reference will use the cached analysis.
Interaction with Prompt Revision
This setting works in conjunction with Perform Extra Revision of Editing Prompts (below). When both settings are enabled and you're generating with references:
- First, any unanalyzed references are automatically analyzed
- Then, the prompt revision step uses this analysis data to refine your prompt
If you only enable prompt revision without automatic analysis, the revision step will still work but may have less information about unanalyzed references to work with.
Additional AI Queries
Enabling this option adds one AI query per unanalyzed reference image. You must have an image analysis backend configured for this feature to work.
This setting is disabled by default.
Perform Extra Revision of Editing Prompts
When enabled, the AI will refine and simplify image editing prompts based on the provided reference images. This additional processing step can improve generation results by better aligning the prompt with your selected references.
This revision step analyzes the reference images (using their analysis data or tags) and adjusts the prompt to:
- Reference characters or elements by their image number instead of re-describing them
- Preserve the scene composition and setting from your original prompt
- Maintain important context like actions, positioning, and mood
- Only describe differences from the reference images when needed
For example, instead of generating a prompt like "Elena, a tall woman with red hair and green eyes wearing a blue dress, stands in a dimly lit tavern," the revised prompt might become "Elena (IMAGE 1) stands in a dimly lit tavern, looking worried" - letting the reference image provide the character's appearance while your prompt defines the scene.
Additional AI Query
This adds an extra AI query to the prompt generation process when reference images are provided.
This setting is enabled by default.
Styles Configuration
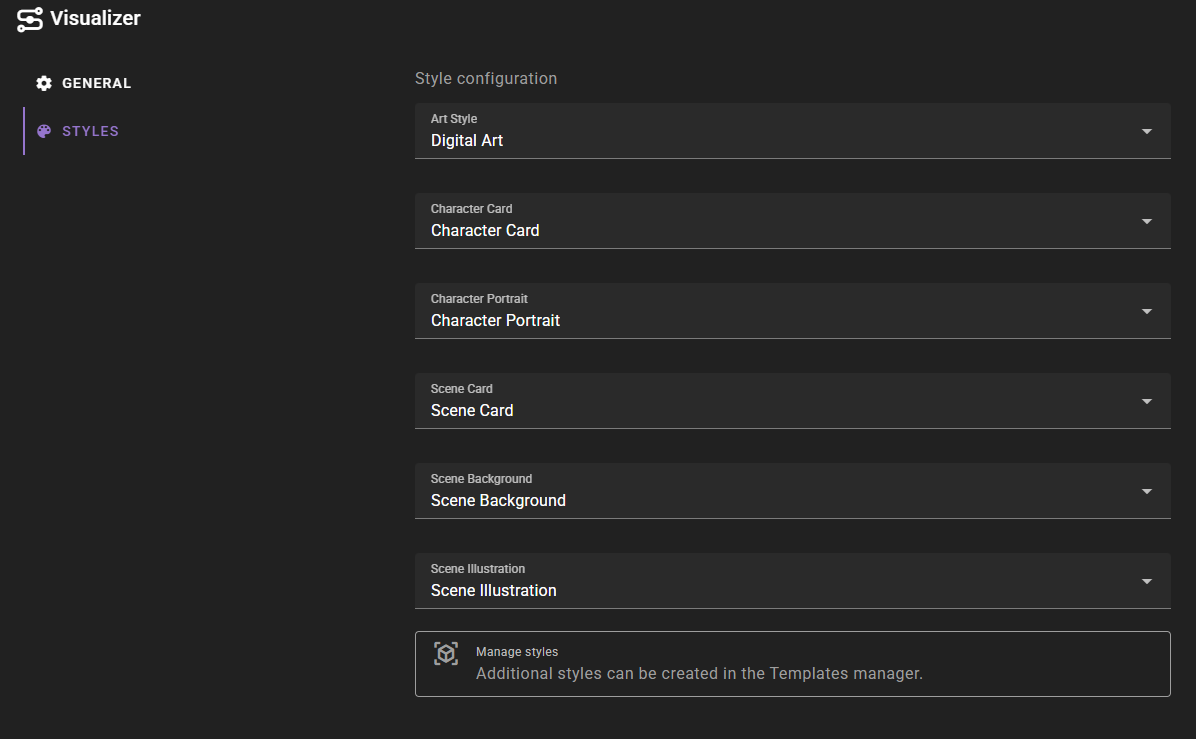
The Styles tab allows you to configure visual styles for different types of content. Each style is a template that defines how prompts are formatted and what visual characteristics are applied.
Style Options
- Art Style: The default art style to use for visual prompt generation. This can be overridden in scene settings.
- Character Card: The style to use for character card visual prompt generation
- Character Portrait: The style to use for character portrait visual prompt generation
- Scene Card: The style to use for scene card visual prompt generation
- Scene Background: The style to use for scene background visual prompt generation
- Scene Illustration: The style to use for scene illustration visual prompt generation
Managing Styles
Additional styles can be created and managed in the Templates manager. Styles are reusable templates that define visual characteristics, keywords, and instructions for different types of visual content.
Each style template can include:
- Positive keywords (things to include)
- Negative keywords (things to avoid)
- Descriptive text (detailed descriptions)
- Instructions (specific generation instructions)
These styles are applied automatically when generating images based on the visual type you select.
Resolution Presets
Local image generation backends (ComfyUI, SD.Next, and AUTOMATIC1111) include a resolution preset picker that lets you quickly select appropriate image dimensions for your generated images. This feature appears in each backend's configuration section.
How It Works
The resolution preset picker provides settings for three aspect ratios that match the format options available during image generation:
- Square: Used for character portraits and icons (e.g.,
CHARACTER_PORTRAITvisual type) - Portrait: Used for tall images like character cards (e.g.,
CHARACTER_CARD,SCENE_CARDvisual types) - Landscape: Used for wide images like scene backgrounds (e.g.,
SCENE_BACKGROUND,SCENE_ILLUSTRATIONvisual types)
Each resolution setting displays two number fields for width and height, along with a dropdown menu button that reveals available presets.
Available Presets
The preset picker includes resolution options optimized for different model types:
| Preset | Square | Portrait | Landscape |
|---|---|---|---|
| SD 1.5 | 512 x 512 | 512 x 768 | 768 x 512 |
| SDXL | 1024 x 1024 | 832 x 1216 | 1216 x 832 |
| Qwen Image | 1328 x 1328 | 928 x 1664 | 1664 x 928 |
| Z-Image Turbo | 2048 x 2048 | 1088 x 1920 | 1920 x 1088 |
Selecting a Preset
To select a resolution preset:
- Open the Visualizer agent settings
- Navigate to the backend configuration tab (ComfyUI, SD.Next, or AUTOMATIC1111)
- Find the Resolutions section
- Click the dropdown menu button next to the resolution you want to change
- Select the appropriate preset for your model
You can also manually enter custom width and height values by typing directly into the number fields.
Backend-Specific Settings
Resolution presets are configured separately for text-to-image and image editing operations if you're using a backend that supports both (like ComfyUI or SD.Next). This allows you to use different resolutions for each type of generation.
Cloud Backends
Cloud-based backends (Google, OpenAI, OpenRouter) do not have resolution presets because they use fixed or automatically determined resolutions based on the model's capabilities.